1. Introduction
This quick install guide will assist in installing SharePoint foundation 2013 server to address certain technical / business requirements. This type of installation will have some limitations and might not be fit for production deployments.
2. Preparation Tasks
The following preparation tasks will be required before starting the SharePoint 2013 Foundation installation:
- Download SharePoint 2013 Foundation
- Document SharePoint URL that users will use e.g. https://sharepoint.company.com
- Acquire / Install Certificate with correct URL, example “AD CS Install Guide for Azure AD Domain Services“
3. Assumptions
The following assumptions are made during the creation of this article:
- Active Directory or Azure AD Domain Services is up and running
- Active Directory Member server, running windows 2012 R2
- Unrestricted internet access
- SSL Certificate is available for site.
- Experience in SSL certificates
- Access to DNS Server to create records
If using Azure AD Domain Services, changing DNS record will not be allowed.
2. Installation
The installation is broken up into two parts:
- Framework installation
- Configuration
2.1. Framework installation
- Run the “sharepoint.exe” that was downloaded in the preparation tasks
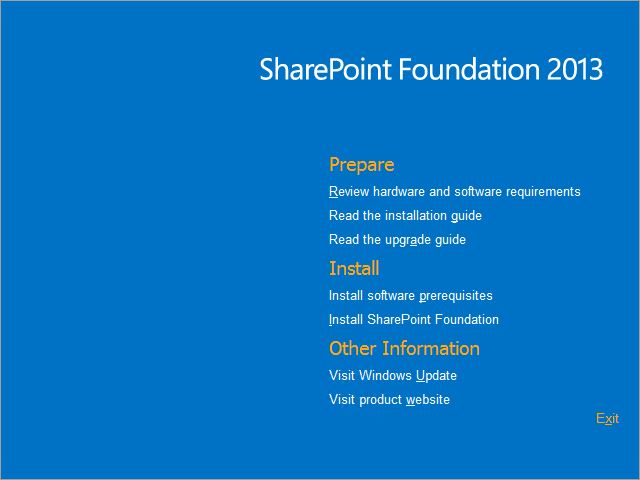
- Click “Install software prerequisites“
- Click “Next“
- Check “I accept the terms of the License Agreement(s)“
- Click “Next”
The process will install all required roles and software, during the installation the server will be reboot twice, logon with the same user account that was used to continue installation.
- Run the “sharepoint.exe” that was downloaded in the preparation tasks
-
-
Click “Install SharePoint Foundation“
- Choose “Stand-alone” installation
- Click “Install Now“
- Check “Run the SharePoint Products Configuration Wizard now.“
- On the Welcome Screen, Click “Next“
- On warning dialog, Click “Yes“
- Click “Finish“
2.2 Configuration
Once the steps above have completed, SharePoint foundation will be installed and running. Users will be able to connect to the default SharePoint Team Site, by using http://<servername> URL.
To change the default URL to the required URL, follow these steps:
- Import SSL certificate into local computer store
- Open “SharePoint 2013 Central Administration“
- Under “System Settings“, Click “Configure alternate access mappings“
- Click “Edit Public URLs“
- In “Alternate Access Mapping Collection:” list, choose “SharePoint – 80“
- In “Default“, Change http://<servername> to https://<newURL> e.g. https://sharepoint.company.com
IIS Manager Configuration
The following task should be done on IIS Manager to allow the configuration changes:
- Open “Internet Information Services (IIS) Manager” console
- Go to <SERVERNAME>\Sites\, click “SharePoint – 80“
- On the right hand site, click “Bindings…“
- Click “Add…“
- In Type, choose “HTTPS“
- In Host name, enter the new dns address e.g. sharepoint.company.com
- In SSL certificate, choose the imported SSL certificate
- Click “OK“
- Remove “http” binding
- Click “Close“
User’s should be able to use the new secure URL to access the SharePoint team site. e.g. https://sharepoint.company.com
P.S. Make sure to include the new URL into user Internet Explorer local intranet zones
Conclusion
Basic SharePoint 2013 foundation team site will be running and available for business, the solution will be using windows internal database and have some limitations.