1. Introduction
This article will show the quick configuration tasks, that are required to make Azure AD a trusted identity provider for a SharePoint 2013 installation.
2. Assumptions
The following assumptions are made during this article:
- General knowledge of the technologies discussed in this article
- A SharePoint 2013 instance is available
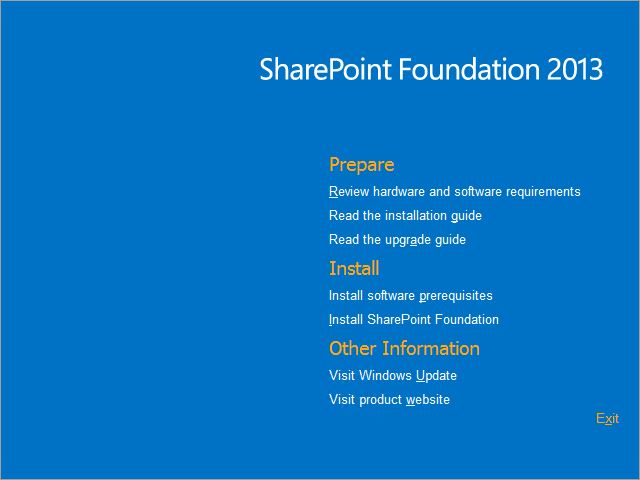
- Related article: Quick install guide for SharePoint foundation 2013
- SharePoint Instance is using SSL
- Related article: AD CS install guide for Azure AD Domain services
- A Azure AD instance is available
- Related article: Getting started with Azure active directory free edition
- All tasks will be done from the SharePoint Server
- The SharePoint Server have unlimited internet access
- Permissions required:
- securityadmin on the SQL instance
- db_owner on the SQL instance
- Administrators group on the server
- Global Administrator for Azure AD
- In this example the following will be used in the article (Please change to reflect own implementation):
- Namespace name: “Company”
- SharePoint 2013 Url: “https://sharepoint.company.com”
3. Preparation
Before starting with the article the following needs to be in place:
- Azure AD PowerShell tools installed, look here for more details.
4. Configuration
The configuration will be broken into the following sections:
- Azure AD configuration
- SharePoint configuration
- Assigning Users
4.1 Azure AD Configuration
Follow these tasks to document the Azure AD WS-Federation metadata URL for later use:
- In the Azure Management Portal (Classic), Click Active Directory.
- Click on the Azure AD that will be integrated with SharePoint 2013
- Click Applications
- On the bottom bar, Click View Endpoints
- Document the Federation metadata document url for later use
Follow these tasks to create / configure the namespace in Azure AD :
- In the Azure Management Portal (Classic), Click Active Directory.
- Click Access Control Namespaces, and create a new namespace and called it “Company”
- Click Manage on the bottom bar. This should open https://company.accesscontrol.windows.net/v2/mgmt/web.
- Click Identity Providers, Click Add
- Click WS-Federation identity provider, click Next.
- In Displayname enter, “Company”
- In Login link Text enter, “Company”
- In WS-Federation metadata, choose URL and enter the URL that was documented in tasks above Example: https://accounts.accesscontrol.windows.net/company.onmicrosoft.com/FederationMetadata/2007-06/FederationMetadata.xml
- Click Save
- Click Relying party applications, then click Add
- Enter the following in each field:
- Name: “Company SharePoint”
- Realm: “urn:sharepoint:company”
- Token format: SAML 1.1
- Token lifetime (secs) default is 600: Recommended value is 2 hours
- Click Save
- Click Rule Groups, and then Add
- Click Generate
- Click Add
- Fill in all the fields as illustrated below:

- Click Save
- Delete the existing claim rule named upn
- In the Access Control Service pane, under Development, click Application integration.
- In Endpoint Reference, locate the Federation.xml that is associated with your Azure tenant, and then copy the location in the address bar of a browser.
- In the Federation.xml file, locate the RoleDescriptor section, and copy the information from the <X509Certificate> element, as illustrated in the following figure.

- from the root of drive C:\, create folder named Certs
- Save the X509Certificate information using notepad to the folder C:\Certs and name the file ACS.cer
- Run the following PowerShell commands:
- “Connect-MsolService”
- “Import-Module MSOnlineExtended -Force”
- $replyUrl = New-MsolServicePrincipalAddresses -Address “https://company.accesscontrol.windows.net”
- “New-MsolServicePrincipal -ServicePrincipalNames @(“https://company.accesscontrol.windows.net”) -DisplayName “Company ACS Namespace” -Addresses $replyUrl”
4.2 SharePoint 2013 Configuration
Follow these steps to configure Azure AD as the identity provider for SharePoint 2013:
- From the Start menu, click All Programs.
- Click Microsoft SharePoint 2013 Products.
- Click SharePoint 2013 Management Shell
- Run the following PowerShell commands:
- $root = New-Object System.Security.Cryptography.X509Certificates.X509Certificate2(“C:\Certs\ACS.cer”)
- New-SPTrustedRootAuthority -Name “Token Signing Cert Parent” -Certificate $root
- $cert = New-Object System.Security.Cryptography.X509Certificates.X509Certificate2(“C:\Certs\ACS.cer”)
- New-SPTrustedRootAuthority -Name “Token Signing Cert” -Certificate $cert
- $map1 = New-SPClaimTypeMapping -IncomingClaimType “http://schemas.xmlsoap.org/ws/2005/05/identity/claims/upn” -IncomingClaimTypeDisplayName “UPN” -SameAsIncoming
- $map2 = New-SPClaimTypeMapping -IncomingClaimType “http://schemas.xmlsoap.org/ws/2005/05/identity/claims/givenname” -IncomingClaimTypeDisplayName “GivenName” -SameAsIncoming
- $map3 = New-SPClaimTypeMapping -IncomingClaimType “http://schemas.xmlsoap.org/ws/2005/05/identity/claims/surname” -IncomingClaimTypeDisplayName “SurName” -SameAsIncoming
- $map4 = New-SPClaimTypeMapping -IncomingClaimType “http://schemas.microsoft.com/ws/2008/06/identity/claims/role” -IncomingClaimTypeDisplayName “Role” -SameAsIncoming
- $realm = “urn:sharepoint:company”
- $signInURL = “https://company.accesscontrol.windows.net/v2/wsfederation”
-
$ap = New-SPTrustedIdentityTokenIssuer -Name “ACS Provider” -Description “SharePoint secured by SAML in ACS” -realm $realm -ImportTrustCertificate $cert -ClaimsMappings $map1,$map2,$map3,$map4 -SignInUrl $signInURL -IdentifierClaim “http://schemas.xmlsoap.org/ws/2005/05/identity/claims/upn”
-
Verify that the user account that is performing this procedure is a member of the Farm Administrators SharePoint group.
In Central Administration, on the home page, click Application Management.
- On the Application Management page, in the Web Applications section, click Manage web applications.
- Click the appropriate web application.
- From the ribbon, click Authentication Providers.
- Under Zone, click the name of the zone. For example, Default.
- On the Edit Authentication page, in the Claims Authentication Types section, select Trusted Identity provider, and then click the name of your provider, which for purposes of this article is ACS Provider. Click OK.
- The following figure illustrates the Trusted Provider setting.

4.3 Assigning Users
Use the following steps to set the permissions to access the web application.
- In Central Administration, on the home page, click Application Management.
- On the Application Management page, in the Web Applications section, click Manage web applications.
- Click the appropriate web application, and then click User Policy.
- In Policy for Web Application, click Add Users.
- In the Add Users dialog box, click the appropriate zone in Zones, and then click Next.
- In the Add Users dialog box, type user2@company.onmicrosoft.com (ACS Provider).
- In Permissions, click Full Control.
- Click Finish, and then click OK.
Conclusion
Azure AD is the trusted identity provider for SharePoint 2013, and Azure AD users will be able to authenticate and use SharePoint 2013 resources.
External Links
Some good extra reading articles:
- Using Microsoft Azure Active Directory for SharePoint 2013 authentication
- Understanding WS-Federation
- List of Tutorials on How to Integrate SaaS Apps with Azure Active Directory